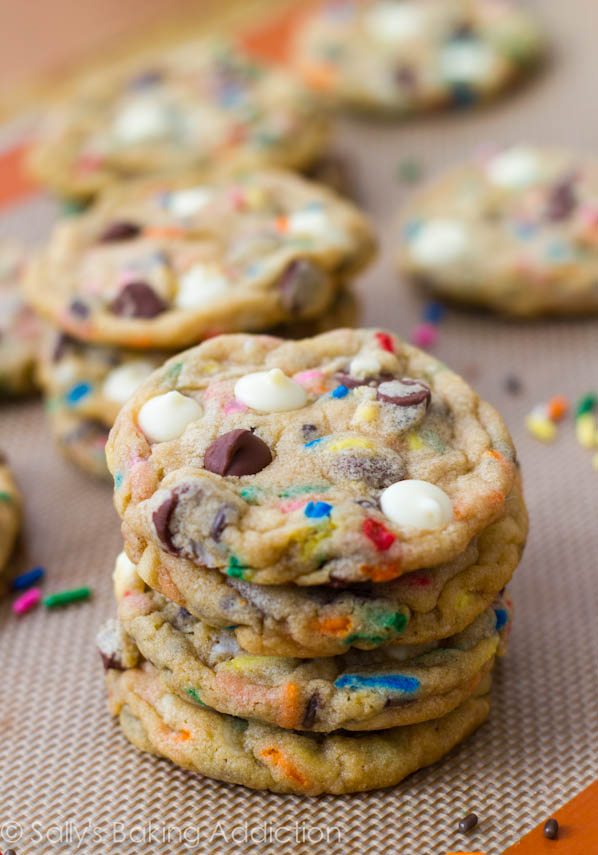
Cake Batter Chocolate Chip Cookies


Cake Batter Chocolate Chip Cookies:
What you'll need:
  • 1 and 1/4 cup all-purpose flour
  • 1 and 1/4 cup yellow or white boxed cake mix
  • 1/2 teaspoon baking soda
  • 3/4 cup (1.5 sticks) unsalted butter, softened to room temperature
  • 1/2 cup granulated sugar
  • 1/2 cup light brown sugar
  • 1 egg, at room temperature
  • 1.5 teaspoons vanilla
  • 1 cup chocolate chips (I used a blend of white and semi-sweet chocolate chips)
  • 1/2 cup sprinkles
How to do it:
  1. In a large bowl, sift together flour, cake mix, and baking soda. Set aside. In a separate bowl, cream together the butter and sugars on medium speed. Mix in the egg and vanilla until creamy.
  2. Add the flour mixture to the wet ingredients and mix until just combined. Do not OVERMIX the dough. Fold in the chocolate chips and sprinkles.
  3. Cover and refrigerate dough for at least 1 hour, or up to 4 days. This step is mandatory. The dough is fairly sticky, so chilling the dough is required in order to avoid the cookie from spreading too much.
  4. Preheat oven to 350 degrees.
  5. Scoop rounded tablespoons of the cold dough onto an ungreased baking sheet. Shape your cookie dough balls to be "taller" than they are wide, as pictured above. Make sure to keep dough chilled when working in batches. Bake for 10-12 minutes until edges are slightly browned. (Mine took 10 minutes exactly). The centers will still appear very soft, but the cookies will set as they cool.
  6. Allow the cookies to cool on the baking sheet for 4 minutes and transfer to a wire rack to cool completely.


Enjoy!


Ankara Bracelet


Ankara Bracelet:

What you'll need:

- 12 threads in 6 colours ( 2 of each colour)
The colours used in the tutorial are: blue, red, orange, light orange, yellow and light yellow
- beads

Note: bk: back knot; fk: front knot; R,LY, B, LO, O, Y: colours of thread

How to do it:

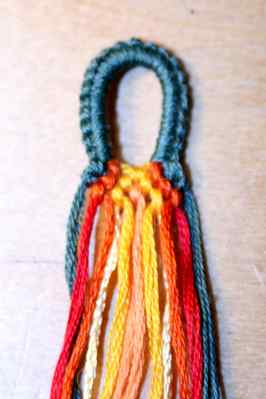
1. Make a buckle and order the threads from the left to the right the following way: 
R, LY, B, LO, O, Y, Y, O, LO, B, LY, R


2. First row: bk (B) - bk (O) - fk (Y) - fk (O) - fk (G)
Second row: bk (B) - bk (O) - bk (Y) - fk (Y) - fk (O) - fk (B)
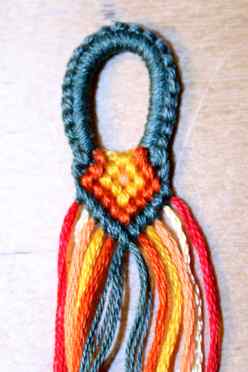
Third row: bfk (O) - bfk (Y) - fk (LO) - fbk (Y) - fbk (O)


3. row 4: fk (B) - fk (O) - fk (Y) - bk (Y) - bk (O) - bk (B)
row 5: fk (B) - fk (O) - fk (Y) - bk (O) - bk (B)
row 6: fk (B) - fk (O) - bk (O) - bk (B)
row 7: fk (B) - fk (O) - bk (B)
row 8: fk (B) - bk (B)
row 9: fk (B)


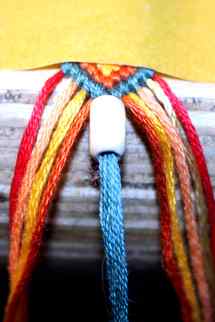
4. Add a bead over the two blue threads and make a forward knot and a backward knot with the blue threads to close it:


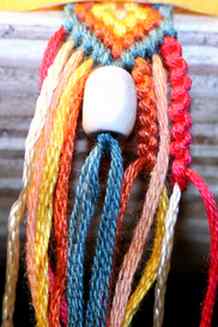
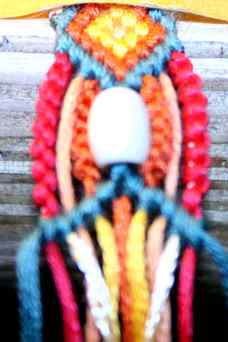
5. Take the orange and the yellow string and make 6 or 7 orange forward/backward-knots (the number of knots depends on the dimension of the bead).

Then you leave out the light orange string and make 7 or 8 red backward/forward-knots with the red and light yellow threads:


Make it on both sides:


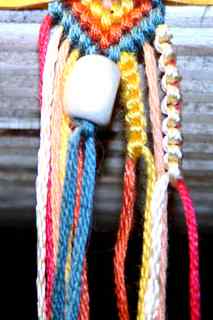
6. Make 6 blue backward-knots on the left and 5 blue forward-knots on the right side (you'll have a chevron):


7. Take the two orange threads from the middle and make 4 backward-knots + 1 bfk on the left side and 3 forward knots + 1 fbk on the right side.

Take the two yellow threads and make 2 bk + 1 bfk on the left and 1fk + 1fbk on the right.

Make a fk with the light orange threads.

Repeat STEPS 3 and 4:

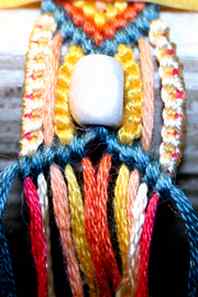
Then repeat STEP 5, but change the colours (6 or 7 yellow bfk instead of orange and 7 or 8 light yellow fbk instead of red):


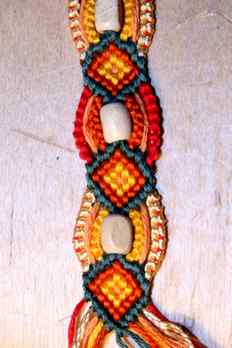
Repeat the process several times, and there you are:


Enjoy!

Bird Nest Necklace

Bird Nest Necklace:

What you'll need:

- Wire
- Beads
- Necklace Chain

How to do it:

1. Select the beads you want, string them onto your wire and arrange them as you'd like.

2. Simply wrap the wire around the beads

3. wrap some wire in the space between each bead (I like the look of three loops but you could just do one or two if you prefer)


4. With the wire make a little loop.

5. Attach the necklace chain.


Finished!


It's so simple!

Enjoy!

A picture of branches


What you'll need:

- old picture frames
- branches
- Black Paint (optional)
- metallic spray paint
- very strong stapler


How to do it:

1. Spray paint your frame and let it dry


2. Turn the frame over and paint the branches in black. Lay them evenly.

3. Trim the branches so they line up with the edge of the frame.


4. Staple them to the frame.


5. Finally turn your frame over.


Enjoy!

Flower Crown

Floral Crown:

What you'll need:


Supplies

How to do it:

1. Create a circle that fits comfortably around your head, that is easy to take on and off. i tripled the amount of wire and then wrapped a fourth time around to make it extra sturdy.

2. Cut your first bloom and place it in the desired direction on the crown. using a small 4 inch piece of wire, wrap the bloom tightly with wire to the circle with pliers.

One

 Continue doing so with more blooms, layering the flowers on top and side by side one another until you start to build a full crown of pretty flowers.

Two

You can continue all the way around the circle and fill the entire crown with flowers or leave about one third of the crown empty as i did with my crown. if you do decide to leave an open space on your crown you will want to wrap the exposed wire with floral tape and i did below.

3. The floral tape is slightly sticky so tightly wrap the exposed wires together from one end to the other.

Four

That's it!

Five

Enjoy!


Aztec Print Shorts

Aztec Print Shorts

What you'll need:

Stained by Sharpie Fabric Markers
- Denim Shorts ( for the aztec shorts, it is best if you bleach the bottom)
-  A piece of cardboard or a magazine (to put between the front and back of whatever you're drawing on)
- A picture for inspiration
- A pencil or washable pen

How to do it:

1. First, find your inspiration picture.

Shorts:


2. Make sure to put your piece of cardboard between your shorts if not the sharpie could bleed through to the other side.

3. If needed sketch your design with your pencil or washable pen, it will come out in the wash so don't worry if the sharpie doesn't cover all of the sketch marks.

4. Finally draw the design! Draw on your shorts just as you draw on paper. It's that simple!

Enjoy!

Strawberry shortcakes


Strawberry shortcake

What you'll need:

FOR THE SHORTCAKES:

325g plain flour
1/2 teaspoon salt
1 tablespoon baking powder
5 tablespoons caster sugar
125g unsalted butter, frozen
1 large egg, beaten
125ml single cream
1 large egg white, lightly beaten
1 baking tray, greased or lined
6 1/2cm round cutter

FOR THE FILLING:
Approximately 300g strawberries
1 tablespoon caster sugar
Few drops balsamic vinegar (optional)
250ml double cream or creme fraiche
How to do it:

Preheat the oven to 220ºC/gas mark 7.

1. Mix the flour, salt, baking powder and 3 tablespoons of the sugar in a bowl. Grate the butter into these dry ingredients and use your fingertips to finish crumbling the butter into the flour. Whisk the egg into the cream, and pour into the flour mixture a little at a time, using a fork to mix. You may not need all of the eggy cream to make the dough come together, so go cautiously.

2. Turn the dough out onto a lightly floured surface, and roll gently to a thickness of about 2cm. Dip the cutter in flour and cut out as many rounds as you can. Work the scraps back into a dough, re-roll and finish cutting out  you should get 8 in all. Place the shortcakes about 21/2cm apart on the baking sheet, brush the tops with the egg white, and sprinkle them with the remaining 2 tablespoons of caster sugar. If it helps with the rest of your cooking, or life in general, you can cover and refrigerate them now for up to 2 hours.

3. Bake for 10-15 minutes, until golden-brown, and let them cool for a short while on a wire rack. Meanwhile, crush half the strawberries with the spoonful of sugar and the few drops of balsamic vinegar if using, and halve or quarter the remaining strawberries, depending on their size. Whip the double cream, if you're using.

4. The shortcakes should be eaten while still warm, so split each one across the middle and cover with a spoonful of the crushed strawberry mixture, a few halved or quartered strawberries, then dollop some whipped cream or creme fraiche on top, and set the top back on.


Enjoy! 

DIY Fringe Net Top

DIY Fringe Net Top

What you'll need:

- A plain tank top
- Scissors

How to do it:

1. Start by cutting the bottom of the tank in even strips


2. Divide them and knot them for the first tier


3. Take a strip from each knot and knot those ones to create the second tier


And Voila!


Enjoy!

Jam filled Doughnuts


Doughnuts


What you'll need:

How to do it:

  1. Mix the yeast with half a teaspoon of the sugar and two tablespoons of the warm milk. Place in a warm place to rest for 15 minutes, or until frothy.
  2. Sift the flour and salt into a large bowl. Stir in one tablespoon of the sugar.
  3. Make a well in the flour and pour in the yeast mix, the rest of the milk, the melted butter and the egg. Mix to make a dough and then knead, cover the bowl and leave to stand for 45 minutes, or until the dough has doubled in size.

  4. On a floured work surface, knead the dough for five minutes, then divide into 12 balls and place in a warm place for 30 minutes, or until they have doubled in size.

  5. Heat the oil in a deep pan until it reaches 190C/375F, or a cube of bread dropped in sizzles and turns golden in 30 seconds. (CAUTION: hot oil can be dangerous. Do not leave unattended.)
  6. Gently lower the dough balls one at a time into the hot oil, in batches of two or three, and fry for 3-5 minutes or until golden-brown, and then carefully turn over. Remove from the hot oil with a slotted spoon and drain on kitchen paper.
  7. Roll the hot doughnuts in the remaining sugar. Make a small slit in the doughnut with the tip of a knife, and fill with a teaspoon of jam. Serve.


Enjoy!


DIY Glow in the dark nails


Glow in the dark nails:
What you'll need:
- glow sticks
- nail polish ( most likely a similar colour to your glow stick)
How to do it:
1. Grab your favorite glow stick and a bright nail polish, but try to roughly match the colors.  For example, if you have a red polish, try to grab a pink or orange glow stick.
2. Crack the glow stick, shake, and then cut the tip off
3. Place the cut end into the nail polish container, and cut the other end as well
4.  The radiant liquid should slowly, but surely come out of the stick and into the nail polish
5. Put the top on and shake, then paint your nails normally!

Enjoy!

DIY Polka Dot Owl T-SHIRT


DIY Polka Dot Owl Shirt

DIY Polka Dot Owl T-Shirt:

What you'll need:

- A T-Shirt
- Freezer Paper
- Fabric Paint and acrylic paint
- iron
- kitchen sponge
- A Pencil with eraser end

How to do it: 

Download the template here. Print 
on freezer paper, then cut along the outside line. Iron it on your shirt, then paint it. I used a kitchen sponge (cause I like the finish more than foam brushes) - it makes the paint look more vintage-y. To make it semi-cloudy like mine, mix 1 part white fabric paint with 1 part black acrylic paint and make sure you don't mix it well - you want to leave some white and grayish strands. Then proceed to dab it onto the shirt with your sponge. After it's a bit dry, add your dots - I used the eraser end of a normal pencil. Blot the excess paint with paper, wait for it to dry, and iron to seal.


Super Cute ain't it?

Enjoy!

Melted Crayon Art

Melted Crayon Art is the DIY trend and it is so very simple here is how to do it:

What you'll need:

- a canvas
- crayons
- hot glue gun
- hair/blow dryer

How to do it:

1. Sort your crayons out however you want. A rainbow is a popular design so if you choose it, place the crayons in order of a rainbow.

2. Hot glue each crayon to the top of the canvas with or without the wrapper, doesn't really matter.


3. Lean the canvas against a wall so the wax will drip downwards. Make sure to protect the floor because this is going to be messy.


4. Use the hair dryer and blow the crayons. Downwards! Just a reminder.


5. Let it dry and admire your masterpiece.


Enjoy!


Shop SheIn for the latest in Fall and Winter Fashions